Wednesday, May 14, 2008
Project Piece Due Dates
Due Points
Isometric Sketch Packet--- 5/6 100
Sketch of Puzzle Cube Box ---- 5/14 25
Draft of Box 5/16 100
Cardboard Model 5/20 100
Metal Etching 5/27 100
Fabricated Metal Box 6/7 300
Grading for Sheet Metal Project
SHEET METAL PROJECT (300 POINTS)
Sheet metal fabrication provides an excellent way of exploring manufacturing processes, such as measurement, layout, shearing, notching, punching, bending, hemming, spot welding, finishing and the associated safety procedures. To this end, a simple sheet metal product will be fabricated within the activity time schedule.
OBJECTIVES
1. Introduce students to basic manufacturing processes.
2. Give students an opportunity to fabricate a product and provide process documentation.
MATERIAL
Each student will be given enough 20-gage plain sheet steel to fabricate into an approved product. The student may purchase extra and/or associated material(s) as the case may be.
REQUIREMENTS, CRITERIA, AND FORMAT OF PROJECT
Students are required to review and familiarize relative laboratory tools, safety procedures and instructor demonstrations before engaging in this project. All written work must be typed. Each student must produce the following within the activity time schedule provided (see product activity schedule):
1. Process Planning Documents:
a) Process charts (8 points)
b) Operation process charts (7 points)
2. A product approved by instructor to meet the following product quality attributes:
a. All specified product dimensions to be within +/- 05” (15 points)
b. Overall finish (burrs, dents, warps, roughness etc.) (10)
c. Product functionality (functional, completeness, durability, sits flat when
assembled, strong weld etc.) 10
EXTRA CREDIT (3 Points)
You may want to paint your product for extra credit of three (3) points. The painting is not a requirement but may demand additional skill, time and material. The paint job must not show any evidence paint runs, uneven spray, wetness, pealing etc.
SUGGESTED PROCEDURES
1. Begin by studying the drawings provided by instructor
2. Do your process planning (must be typed)
3. Determine amount of material needed using the formula: total length of blank before bending = L = l1+l2+...+(Pa1/180)R1+(Pa2/180)R2 +... (Where R= radius of neutral axis= a+0.4t; a = inner radius of bend; t = thickness of sheet metal)
4. Cut rough stock
5. Trim to size
6. Do the layout
7. Process material
8. Submit for grading
GRADING CRITERIA FOR PROJECT ONE (50 POINTS)
STUDENT: _______________________________________
CRITERIA POSSIBLE POINTS POINTS EARNED
PROCESS PLANNING:
1. Process charts 40 ______________
(Completeness, format & clarity)
2. Operation process chart 45 ______________
(Completeness, format & clarity)
PRODUCT QUALITY:
1. Required dimensions to be
within +/- .o5” 45 ______________
(Completeness, within tolerance etc.)
2. Overall finish (burrs, dents, warps,
sharp corners, scratches, rough
finish etc.) 75 _____________
3. Product Functionality (functional,
completeness, durability, sits flat when
assembled, strong weld etc.) 75 ______________
TOTAL POINTS RECEIVED OUT OF 300 ______________
Comments:
Monday, May 12, 2008
Steps to Creating the Box
Thursday, May 8, 2008
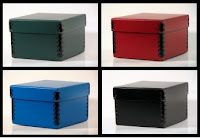
Making a box for your cube

Now that it is Friday, and you have handed in your:
- Puzzle Cube Walkthrough
- The Isometric Practice Packets
- Your Assembled 3d puzzle cube
- The box should be measured to allow the cube to slide in and out easily
- It should have a hinge
- It should have a lid
- You should account for how the sides will be attached: spot weld, rivet, Pittsburgh seam
You should include all of the perspectives and two isometric views
You should draw the box unfolded
Try make the box in one piece if possible, and if not, show what other pieces will be included.
Annotate your drawings so that you have a written description of what is being displayed and how it will be manufactured.
Animating your 3d

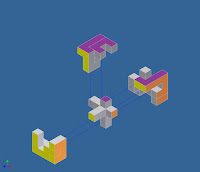
Now that you have created your cube by creating, decorating, and assembling the pieces into an assembly file, you can create an exploded view. This will show the relationships between the parts.
When you have done this--and remember, the way you use constraints around a central piece will affect your exploded view and animation--you can begin to create an animation of the cube assembling and disassembling.
Here is an example of an animated video clip of a puzzle cube made by a student that demonstrates the video capture and the explosion of the components and the re-assembly.
Tuesday, May 6, 2008
Upcoming Schedule
Packet finished by Thursday
Create sheet metal sketch of box for cube
Build box in metal shop
Create autodesk plan for tool box
build tool box in sheet metal shop
