Tuesday, August 26, 2008
Spore
Friday, August 15, 2008
Games, Learning, and Society: Dance Dance Education
These slides were shared at Games, Learning and Society 2008
Saturday, August 9, 2008
Wednesday, May 14, 2008
Project Piece Due Dates
Due Points
Isometric Sketch Packet--- 5/6 100
Sketch of Puzzle Cube Box ---- 5/14 25
Draft of Box 5/16 100
Cardboard Model 5/20 100
Metal Etching 5/27 100
Fabricated Metal Box 6/7 300
Grading for Sheet Metal Project
SHEET METAL PROJECT (300 POINTS)
Sheet metal fabrication provides an excellent way of exploring manufacturing processes, such as measurement, layout, shearing, notching, punching, bending, hemming, spot welding, finishing and the associated safety procedures. To this end, a simple sheet metal product will be fabricated within the activity time schedule.
OBJECTIVES
1. Introduce students to basic manufacturing processes.
2. Give students an opportunity to fabricate a product and provide process documentation.
MATERIAL
Each student will be given enough 20-gage plain sheet steel to fabricate into an approved product. The student may purchase extra and/or associated material(s) as the case may be.
REQUIREMENTS, CRITERIA, AND FORMAT OF PROJECT
Students are required to review and familiarize relative laboratory tools, safety procedures and instructor demonstrations before engaging in this project. All written work must be typed. Each student must produce the following within the activity time schedule provided (see product activity schedule):
1. Process Planning Documents:
a) Process charts (8 points)
b) Operation process charts (7 points)
2. A product approved by instructor to meet the following product quality attributes:
a. All specified product dimensions to be within +/- 05” (15 points)
b. Overall finish (burrs, dents, warps, roughness etc.) (10)
c. Product functionality (functional, completeness, durability, sits flat when
assembled, strong weld etc.) 10
EXTRA CREDIT (3 Points)
You may want to paint your product for extra credit of three (3) points. The painting is not a requirement but may demand additional skill, time and material. The paint job must not show any evidence paint runs, uneven spray, wetness, pealing etc.
SUGGESTED PROCEDURES
1. Begin by studying the drawings provided by instructor
2. Do your process planning (must be typed)
3. Determine amount of material needed using the formula: total length of blank before bending = L = l1+l2+...+(Pa1/180)R1+(Pa2/180)R2 +... (Where R= radius of neutral axis= a+0.4t; a = inner radius of bend; t = thickness of sheet metal)
4. Cut rough stock
5. Trim to size
6. Do the layout
7. Process material
8. Submit for grading
GRADING CRITERIA FOR PROJECT ONE (50 POINTS)
STUDENT: _______________________________________
CRITERIA POSSIBLE POINTS POINTS EARNED
PROCESS PLANNING:
1. Process charts 40 ______________
(Completeness, format & clarity)
2. Operation process chart 45 ______________
(Completeness, format & clarity)
PRODUCT QUALITY:
1. Required dimensions to be
within +/- .o5” 45 ______________
(Completeness, within tolerance etc.)
2. Overall finish (burrs, dents, warps,
sharp corners, scratches, rough
finish etc.) 75 _____________
3. Product Functionality (functional,
completeness, durability, sits flat when
assembled, strong weld etc.) 75 ______________
TOTAL POINTS RECEIVED OUT OF 300 ______________
Comments:
Monday, May 12, 2008
Steps to Creating the Box
Thursday, May 8, 2008
Making a box for your cube
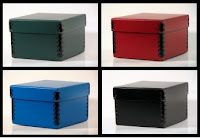
Now that it is Friday, and you have handed in your:
- Puzzle Cube Walkthrough
- The Isometric Practice Packets
- Your Assembled 3d puzzle cube
- The box should be measured to allow the cube to slide in and out easily
- It should have a hinge
- It should have a lid
- You should account for how the sides will be attached: spot weld, rivet, Pittsburgh seam
You should include all of the perspectives and two isometric views
You should draw the box unfolded
Try make the box in one piece if possible, and if not, show what other pieces will be included.
Annotate your drawings so that you have a written description of what is being displayed and how it will be manufactured.
Animating your 3d
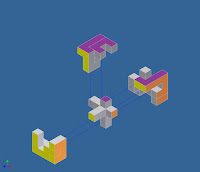
Now that you have created your cube by creating, decorating, and assembling the pieces into an assembly file, you can create an exploded view. This will show the relationships between the parts.
When you have done this--and remember, the way you use constraints around a central piece will affect your exploded view and animation--you can begin to create an animation of the cube assembling and disassembling.
Here is an example of an animated video clip of a puzzle cube made by a student that demonstrates the video capture and the explosion of the components and the re-assembly.
Tuesday, May 6, 2008
Upcoming Schedule
Packet finished by Thursday
Create sheet metal sketch of box for cube
Build box in metal shop
Create autodesk plan for tool box
build tool box in sheet metal shop
Monday, April 28, 2008
Due dates for Isometric drawings

The first assignment:
Draw your puzzle cube pieces in Autodesk Inventor.
Make sure that you have constrained your pieces with a measurement.
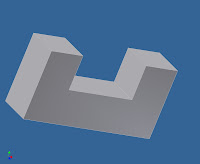
Make the 2d drawing into 3d drawings.
Make each piece and save it in a separate file
We will be assembling these pieces into an animated feature
This is due on Wednesday.
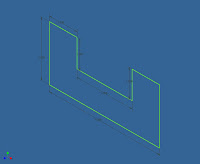
So begin by opening Autodesk Inventor and sketch your pieces in 2d and then extrude them.
Make sure that you have constrained the cube with general dimensions.
Orthographic Drawing--The Mural
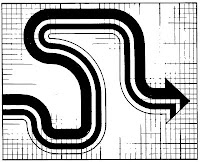 The Mural
How do artists take photos and small pictures and make them so large?
In the next couple of weeks we are going to explore this.
The student will:
Learn to read an create orthographic drawing techniques
Learn to transfer small images into large images
Understand Important vocabulary
One-Point Perspective
Two-Point Perspective
Concurrence
Incenter and Circumcenter
The Centroid
The Euler Line
Special Properties of Triangles
The Golden Ratio
These ideas will be learned in the context of drafting and drawing.
The difference between drafting and drawing is that drafting allows for a systematic reproduction of a picture or item from the world that is replicable by through the use of geomtric shapes and division of space and scale.
What does that mean?
It means that many of us can do murals and learn some of the methods that artists lie Leonardo Da Vinci used to create great works of art as well as how engineers create measurement and the ability to reproduce pictures.
We are going to make a small picture large, and make a large picture small
Monday, April 21, 2008
Ideas for Paper
 First section
- an introduction, and this will be a paragraph long explaining the assignment.
- you should include a section in the paper on the process of making the cube--this included getting the materials, making a team, the pictures of the pieces, the story of the pieces and how your cube changed, who did what, and what kinds of tools and materials you used.
- As you show a picture of each section, you may also want to also show a sequence of the cube being assembled.
 It is important that you show some process in the assembly of the cube because this process is really about how you made the cube, and how to assemble it.
You will also need to include supporting documents, like your isometric sketches.
Monday, April 7, 2008
Due dates
Make sure that you are getting ready to write your walkthrough!
You will need to have each step documented with pictures, isometric drawings of the pieces after each glue session, and you should have a plan for how it will all come together so you can look to see if you did anything differently than you had expected.
You should have the cube finished by Wednesday, you should have data on how long it took people to put it together as well as scores from other groups on
- The level of difficult
- The quality of of craftsmanship
- economy,
- aesthetic,
- and function
The last assignment is the Walkthrough.
This is just like the video game unit walkthrough.
Walkthrough for Puzzle Cube Unit
Due Friday, 4/ 18/08.
Section 1.
Group member names and roles--what did each person do?
How did you start? Take pictures of your initial designs from your engineering notebook. How did you decide how many pieces and other concerns?
Section 2.
Take pictures of your first pieces.
Describe them and who made them.
What is the central piece?
Why did you design it the way you did?
Did you get them to interlock?
Do they stay interlocked when you pick them up?
Include the isometric drawing of each piece.
(You can take photos of these with the camera and
put them into your paper as images.)
Section 3.
How did it go?
Did your Cube work?
Did other groups find it challenging?
Evaluate each cube form different groups.
Describe it in terms of craftsmanship.
What were the qualities of the best cubes?
Why?
How would you do this differently next time?
Puzzle cube walkthrough assignment
Sunday, March 23, 2008
Dry Dock Movie
This may seem a simple task, but these students had to create a curved symmetrical boat hull with a hot wire cutting tool, glue, small wooden dowels, wax paper, some sheet metal, toothpicks, and and hobby saws--no tape. This was especially challenging when it came to the sail, as we normally depend upon tape for everything.
As you can see in this video, the students went through the rapid prototyping process immediately into testing and the iterations of redesign for each design challenge:
- Speed
- Distance
- Weight-bearing
- Stability
- General purpose.
Thursday, March 20, 2008
Puzzle Cube
Thursday, March 6, 2008
Puzzle Cube Assignment Breakdown
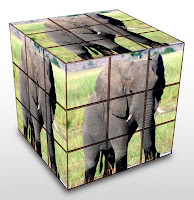
When you have formed a group, you will need to keep on track for finishing this project. In order to do this, here are the steps and the items you will need to turn in to get graded.
Item 1> Create major pieces of your cube and draw an isometric drawing of each one of them. I recommend that each group member, (out of four) have 16 blocks, and they create no more than 5 larger pieces and they must fit together with the other group members pieces to create the larger cube. These pieces should be glued and ordered so that we have an optimal sequence to put the cube together.
Item 2> An annotated plan in your Engineering notebook. This should include descriptions of who is in your group, what your schedule is, and what are your ideas for the overall design.
Remember: This cube is a puzzle, and you will be asking other teams to solve teh puzzle. So you will present it unassembled and you will time how long it takes to put together. The cubes will be used in a contest between class hours, and the top cube from each hour will be made in 10x scale in Styrofoam.
Item 3> Isometric drawing of each piece on graph paper
Item 4> A finished Puzzle cube.
- The cube needs to fit together in a 4x4x4 configuration.
- The cube should have an attractive design on the sides--this can be drawn or a picture can be glued.
- The cube should be able to fit together.
- It should not just fall apart when you pick it up.
Item 5> Isometric drawings on graph paper--one for each piece.
Item 6> A table that tracks the name and time it takes each person to assemble the cube.
There should also be observations about each cube that should give some indication of why it is challenging to assemble--what are the characteristics?
Item 7> An Autodesk Inventor rendering of each piece in 3d. These pieces should be created as an assembly, and then animated to show the assembly process. Try find a way to put the design on your cube onto your AI assembly cube.
Item 8> A self-evaluation of your cube.
You should look at the quality of craftsmanship.
- Craftsmanship is made of:
- Function--it is useful and practical
- Aesthetic--people find it attractive and well designed
- Economy--there is no waste or extra parts associated with it.
- Make a table with two columns
- What I did well
- What I would improve.
- Comment on each element of craftsmanship
Wednesday, March 5, 2008
Standards you met!
CONTENT STANDARD A: Science as Inquiry
As a result of activities, all students should develop
- Abilities necessary to do scientific inquiry
CONTENT STANDARD B: Physical Science
- As a result of the activities, all students should develop an understanding of
- Properties of objects and materials
- Position and motion of objects
- Motions and forces
- Transfer of energy
As a result of activities, all students should develop
National Science Education Standards Grades 5-8 (ages 10 - 14)CONTENT STANDARD A: Science as Inquiry
As a result of activities, all students should develop
- Abilities necessary to do scientific inquiry
- Understandings about scientific inquiry
As a result of their activities, all students should develop an understanding of
- Motions and forces
- Transfer of energy
As a result of activities in grades 5-8, all students should develop
- Abilities of technological design
- Understandings about science and technology
As a result of activities, all students should develop understanding of
- Science and technology in society
As a result of activities, all students should develop understanding of
- Science as a human endeavor
- National Science Education Standards Grades 9-12 (ages 14-18)
As a result of activities, all students should develop
- Abilities necessary to do scientific inquiry
- Understandings about scientific inquiry
As a result of their activities, all students should develop understanding of
- Motions and forces
- Interactions of energy and matter
As a result of activities, all students should develop
- Abilities of technological design
- Understandings about science and technology
As a result of activities, all students should develop understanding of
- Science and technology in local, national, and global challenges
As a result of activities, all students should develop understanding of
- Science as a human endeavor
- Standard 1: Students will develop an understanding of the characteristics and scope of technology.
- Standard 2: Students will develop an understanding of the core concepts of technology.
- Standard 3: Students will develop an understanding of the relationships among technologies and the connections between technology and other fields of study.
- Standard 4: Students will develop an understanding of the cultural, social,economic, and political effects of technology.
- Standard 7: Students will develop an understanding of the influence of technology on history.
- Standard 8: Students will develop an understanding of the attributes of design.
- Standard 9: Students will develop an understanding of engineering design.
- Standard 10: Students will develop an understanding of the role of troubleshooting, research and development, invention and innovation, and experimentation in problem solving.
- Standard 11: Students will develop abilities to apply the design process.
- Standard 18: Students will develop an understanding of and be able to select and use transportation technologies.
- Understanding about science and technology
As a result of activities, all students should develop understanding of
- Science and technology in local challenges
As a result of activities, all students should develop understanding of Science as a human endeavor. National Science Education Standards Grades 5-8 (ages 10 - 14)
CONTENT STANDARD E: Science and Technology
As a result of activities in grades 5-8, all students should develop
- Abilities of technological design
- Understandings about science and technology
As a result of activities, all students should develop understanding of
- Science and technology in society
As a result of activities, all students should develop understanding of
- Science as a human endeavor
- National Science Education Standards Grades 9-12 (ages 14-18)
As a result of activities, all students should develop
- Abilities necessary to do scientific inquiry
As a result of their activities, all students should develop understanding of
- Motions and forces
- Conservation of energy and increase in disorder
- Interactions of energy and matter
As a result of activities, all students should develop
- Abilities of technological design
- Understandings about science and technology
As a result of activities, all students should develop understanding of
Natural and human-induced hazards
- Science and technology in local, national, and global challenges
As a result of activities, all students should develop understanding of
- Science as a human endeavor
- Standards for Technological Literacy - All Ages
- Standard 1: Students will develop an understanding of the characteristicsand scope of technology.
- Standard 2: Students will develop an understanding of the core concepts of technology.
- Standard 3: Students will develop an understanding of the relationships among technologies and the connections between technology and other fields of study.
- Standard 6: Students will develop an understanding of the role of society inthe development and use of technology.
- Standard 8: Students will develop an understanding of the attributes of design.
- Standard 9: Students will develop an understanding of engineering design.
- Standard 10: Students will develop an understanding of the role of troubleshooting, research and development, invention and innovation, and experimentation in problem solving.
- Standard 11: Students will develop abilities to apply the design process.
- Standard 18: Students will develop an understanding of and be able to selectand use transportation technologies.
- Standard 20: Students will develop an understanding of and be able to select and use construction technologies.
Building the Sail
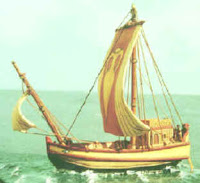 The Unit so far has consisted of learning the difference between design and engineering. At this point, you have learned that engineers have reasons, or a rationale for why they design and construct.
If you were offered $100,000.00 to design a boat, it is likely the person paying what want to know upfront why you are designing it the way that you are.
It needs to have a function or purpose--not just looking cool.
The major design concepts thus far have been:
- Surface Area
- Resistance
- Force
- Balance
- Speed
- Stability
- Center of gravity
- leverage
Teams of students design their own ship's hull on paper, and build it using foam
and other everyday materials. Teams review all hull designs, predict which will go
farthest, and then test their design on water using a spring scale.
You are now ready to create the sail and describe your design choices. It is recommended that you take a look at traditional sails.
In your notebook, you should describe and estimate the size of the sail, the mast, and spar and the materials along with your reasons for the shape, how it works, and why.
At this point, you should have your preliminary hull designed and ready for testing, a sail in the design process or constructed, and you should be ready to race.
The four challenges are:
- Speed
- Stability
- Weight bearing
- General purpose
Monday, March 3, 2008
The Senior Walk Through
From the wikipedia:
A walkthrough is a term describing the consideration of a process at an abstract level. The term is often employed in the software industry (see software walkthrough) to describe the process of inspecting algorithms and source code by following paths through the algorithms or code as determined by input conditions and choices made along the way. The purpose of such code walkthroughs is generally to provide assurance of the fitness for purpose of the algorithm or code; and occasionally to assess the competence or output of an individual or team.
Something akin to walkthroughs are used in very many forms of human endeavour since the process is a thought experiment that seeks to determine the likely outcome(s) of an affair based on starting conditions and the effects of decisions taken.
Your assignment:
This paper is a reflection of the design process you initiated in the Dry Dock assignment, where you designed and created boats for the design challenge. Please create a 3 page document that includes images from Autodesk inventor, the perspectives from your notebook, and the final version of your constructed boat. Each picture should be explained. You should talk about the process of the boat construction from your initial design, to the finished boat.
key terms for this assignment are:
Prototype, Research, Testing, Iterative, Process, and Annotation.
These terms should be used in the paper.
You should also discuss and explain your design choices as they relate to:
Surface Area, Force, Resistance, Speed, Stability, balance, and center of gravity.
You should conclude your paper with statistics of the competitions and discuss how your boat did, how other boats compared, and what looked to be design factors that led to the greatest success in the competitions.
In essence, the paper needs to document and describe the design process from beginning to end, and then provide data about the race outcomes and what design attributes made for the best performing boats.
Wednesday, February 13, 2008
The Washburn Miller Yacht Club Annual Invitational Design Challenge and Race
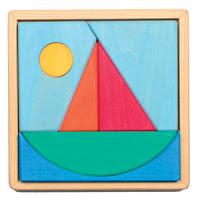
The Washburn Miller Yacht Club Invitational Sailboat Race and Design Competition will happen February 22, 2008.
Students are creating their boats from closed cell foam they designed using 3d modeling software t o compete in four categories:
- Speed
- Stability
- Weight bearing
- General Purpose
The race is set to happen for each class period starting hour 3 in Room 119B.
We invite you to come and watch.
Perspective drawing
You are going to need to sketch four perspectives of your boat design in your engineering notebook:
The back view -- the transom
The side view -- the gunwale
The top view -- The deck
The bottom view -- the hull/ keel
Make sure you have labeled the parts, listed the measures, and described your design rationale and documented where you got some of your design ideas from, i.e. from the hull.pdf document, or form other sources.
Also, give some background on what design challenge you are focused on: speed, stability, weight bearing, or general purpose.
These notebook entries are worth: 40 points
Tuesday, February 12, 2008
Sail Away
This unit explores the role of engineering, physics, and mathematics in sail and boat design.
You will design a small scale sail boat to compete in a variety of competitions, including:
- Speed
- Stability
- Weight transfer
- General purpose
In order to be successful and receive a grade you can be proud of, you should:
- Design and describe a hull for a sailboat. 100 points.
- You should give support for why you are designing the hull in the design you have chosen. Specifically, will your hull be designed for a specific competition, or for the general purpose Grand Prize? Give your reasoning that supports your design and utilize information you have gathered to support your design approach
- Describe the process of using Autodesk Inventor 80 points
- What buttons you pushed, what shapes you used, how you connected those shapes, and what commands you made in the software to create the final product.
- This hull shape does not need to include the bow, just the hull, transom, and keel shape.
- Create a sketch of the hull in your engineering notebook 40 points
- This should include four perspectives:
- The back end: transom
- The bottom: the hull
- The side view: the gunwales
- The top view: the deck
- This should include the measures and descriptions of how you might construct the boat from foam.
- Create a 4 perspective technical drawing of your boat hull 60 points
- Create a technical drawing of your sail and describe the measures and materials you will use to build it and why.
- Use the vocabulary in your reasoning and design description
- Construct the boat based upon your design 100 points
- Test and refine your design
- keep notes and track your design and construction
- measure times, weights, and degree of turbulence and average these.
- create a graph that displays the distribution of the tracked measurements
- Construct the boat and answer the questions in the Sail Away Packet 60 points
- Race the boat 40 points
- Reflect and describe your experience 60 points
- Take the vocabulary quiz
- Take the conceptual quiz describing how wind and water effect boat design 20 points
- Post your measurements and charted averages, a picture of the boat, your team, and post it on your blog 60 points
- Make sure that you post a description of the design process and use the vocabulary
Sunday, February 10, 2008
An approach to building a program
2/5/08
The process I am undertaking in Building my Engineering program is built upon several ideas and actions:
- Bringing attention to the positive.
- I have made a practice of going through my grade book with students each Friday and publicly addressing their success, the specifics of how they have achieved, and then asking if they would like me to call home and describe to a parent or guardian of how proud I am of their achievement.
- Showing that I value students through learning about their interests and engaging with them in fun and conversation.
- Honoring their interests and learning about what they know and can teach.
- Using "how am I doing" surveys.
- Showing that I value students through learning about their interests and engaging with them in fun and conversation.
- Giving opportunities for student leadership and acknowledging when it is instantiated through extending choice, autonomy, and rewards in the grade book.
- Especially when this leadership is focused on helping classmates.
- Especially when this leadership is focused on helping classmates.
- Display of student work and the creation of public venues for advancing their work and showcasing their talent.
- In grading I have built performance assessments through criteria referenced assessments so that students may have choice and description of how they grade out in my class—in essence, allowing them to choose their grades through effort and informed requests for assistance.
- This process allows students the power of scheduling and foresight.
- This process also allows for students to look ahead for aspects of assignments that build to their strengths.
- This process allows for clear and cohesive learning outcomes that can be used as a roadmap.
- This process also allows for students to look ahead for aspects of assignments that build to their strengths.
- Using the discourse of play and learning though doing and creating an open door for those who would like to participate in a continuous improvement system, allowing them to show mastery through additional attempts at an assignment.
- This process of resilience and academic tenacity is rewarded through public praise when appropriate.
- Removing the stress of achievement anxiety and test fatigue.
- This process of resilience and academic tenacity is rewarded through public praise when appropriate.
- Offering high interest, criteria referenced, and standards based curriculum that embodies the content of Project Lead the Way and experiential learning.
- Studying and practicing the curriculum so that traditional formal approaches to teaching can be modified to fit active learning where the content can be discovered and the process is built upon small steps that build early and instant success.
- Make the learning fun through offering educational experiences where the students can:
- Explore, discover, manipulate, share, reflect, build, display, and perform.
- Explore, discover, manipulate, share, reflect, build, display, and perform.
- Using cutting edge technology and tools that connects the learner with Millennial tools for the new labor market and information and innovation economy.
- Studying and practicing the curriculum so that traditional formal approaches to teaching can be modified to fit active learning where the content can be discovered and the process is built upon small steps that build early and instant success.
- Interacting in a community of practice with educators who are interested in continually improving their craft through both the art and science of teaching in continuing coursework, professional journals, and professional development.
- Connecting with educators in my content area
- In school
- In district
- At different grade levels
- Nationally and internationally
- Connecting to the practice in the professional spaces of public and private industry.
- In school
- Bringing resources to my students to enrich their educational experience.
- Working to help them make connections with their aspirations as they develop and refine them.
- Suggesting pathways to develop and extend their talents
- Asking them about their lives, who they are, and who they are in the process of becoming.
- Looking for scholarship, internship, and personal development opportunities in extra –curricular activities, community service, professional and student organizations, and affinity groups.
- Working to help them make connections with their aspirations as they develop and refine them.
- Engaging in action research to question my assumptions about student learning and look for empirically sound methods for showing the growth and achievement of my students and refining my teaching practice.
- Looking at how I create learning contexts, of the students interact, and the outcomes of this process.
- Using validated models of data collection
- Engaging in the process of reflective practice.
- Looking at how I create learning contexts, of the students interact, and the outcomes of this process.
Monday, February 4, 2008
Check list for Games Unit
□ Game Selection reasoning (30):
Create reasoning and support your choice for what game you will be examining for your project. Describe the game, whether you have played it before, and what you expect, or what you know about the contents of the game.
□ Work Plan (100):
Week by week schedule: 4 weeks @ 10 points a week: 40 points
5 points for task descriptions and completion dates
5 points for ideas and key vocabulary
Reflections on what happened week by week plan @ 15 points a week: 60
5 points for how things went
5 points for what you would do to improve for next time
5 points proof of success
□ Blog (300)
o Includes walk through (120) 12 * 10 points each
o Rubric review (110) 11* 10 points each
o Work plan (60)
o Embedded slide show (20)
□ Reflection (45) 5 paragraphs:
o What you liked about the unit
§ What you did not like
§ Be specific—what parts of the assignment did you like / not like
· What did you like/ not like about each assignment
o Would you recommend this assignment or do it again?
□ Slide show presentation (40)
o See rubric
□ Slide Show reviews (10 points for each review)
□ Slide show slides (165) 33 slides @ 5 points each
o Slides must be the required slides for points
□ Games Unit Reflection (100)
□ Contribution (20)
□ Total points possible_____________________910
Monday, January 28, 2008
The Game Industry Salary Survey 2007
- Jill Duffy
Average salary for three or fewer years experience: $44,574
Average salary across all experience levels: $61,538
Be prepared to hear the following words of wisdom over and over again: it is nearly impossible to become a game designer fresh out of college. Game design job are almost never appropriate for entry-level candidates. Designers typically make their way into the industry through some other discipline (for example, by spending two or three years as a programmer or producer), then become a designer later. None of this advice is meant to be discouraging-it's meant to help you formulate a clear and realistic path to your dream job.
Agenda for the week
- The blog
- Slides
- Learning Roles
- Group Contribution
- Project presentation of slides and outcomes
- Summaries of student presentations
Go to Noodeltools.com/noodlebib and sign up for a free account. Create a bibliography for the webpages you referenced in creating your blog and your slide show. You will need to get the name of the author, as well as the web page and build that into the bibliography page in your slides.
While you are doing this today, I will be going over your grades so that you know what you acheived in class for a grade.
Be ready to present tomorrow. We will be using the presentation rubric int he handout folder.
Open the rubric and a new document. In the new document you should write the name of the group, what they are presenting on, a brief summary of what they said, and then score them using the rubric.
Make sure that you put your name on your summaries, and make sure you list the names of the people you are scoring.
| Topics | 4 points | 3 points | 2 points | 1 point |
| Content | Thoroughly and clearly states the main points and precise details that are accurately focused on the design project. | Adequately states the main points and details that are accurately focused on the design project. | States most of the main points and details that focus on the design project. May include some unnecessary information. | States few main points and details that focus on the design project, or information does not relate to topic. |
| Organization | Clearly organized into a logical sequence. Excellent use of an outline. Excellent introduction and conclusion. | Adequate evidence of a logical sequence of information. Good use of an outline. Satisfactory introduction and conclusion. | Fair evidence of a logical sequence of information. Some use of an outline. Weak introduction or conclusion. | Minimal or no outline followed. No logical organization; some digressions. Unclear or confusing. No introduction or conclusion. |
| Delivery | Effectively and creatively delivers the information while staying on the topic and considering the audience. Uses voice variation; interesting and vivid to hear. | Adequately delivers the information while staying on the topic and considering the audience. Speaks clearly and confidently. | Delivers the information but does not stay on the topic. Little consideration of audience. Uses incomplete sentences. | Little or no attempt is made to stay on the topic. Does not consider audience. Presentation is difficult to follow and understand. |
| Preparation | Presentation shows detailed preparation and practice in delivery including use of voice, posture, eye contact, gestures and pace. Good use of pictures, graphs, computer models, etc. Interesting and vivid. | Presentation shows satisfactory preparation, as well as practice in delivery including use of voice, posture, eye contact, gestures, and pace. Some use of pictures, graphs, and computer models, etc. | Presentation shows some preparation and practice in the delivery including marginal use of voice, posture, eye contact, gestures, pace. Limited pictures, graphs, and computer models. | Presentation is lacking in preparation and practice of the delivery including use of voice, posture, eye contact, gestures, pacing, and little or no use of pictures, graphs, and computer models. Difficult to hear. Speaker appears tense. Fidgets often. |
| Quality | Effective use of templates or designs which make the slides visually appealing. Presentation lasted three to five minutes. | Effective use of templates. Slides were somewhat appealing. Presentation lasted three to five minutes. | Ineffective use of templates. Slides were somewhat appealing, but were not consistent. Presentation did not adhere to timeframe. | Slides were not effective or appealing. Presentation did not adhere to timeframe. Presentation showed little preparation. |
| Theme | The PowerPoint had a consistent theme that flowed well throughout the presentation. | The PowerPoint had a theme, but did not flow well throughout the presentation. | The PowerPoint theme was limited or unorganized during most of the presentation. | The PowerPoint had no evidence of a theme. |
| Readability | All words and text are large, bold, and easy to read. Statements are brief and concise. | Most of the words and text are large, bold, and easy to read. Statements are brief and concise. | Some of the words and text are difficult to read. Statements are too long or are missing important elements. | Most of the words and text are difficult to read. Statements are too long or nonexistent. Presentation lacks detail. |
| Creativity | The presentation has many exciting elements that make it stand out from other presentations. | The presentation has some exciting elements which allow it to stand out. | There is little evidence of creativity that would allow this presentation to stand out. | The presentation lacks creativity and detail. |
| Pictures | There is an abundance of relevant, high quality pictures that support and enhance the presentation. | There are some relevant pictures that helped to enhance the presentation. | There are only a few relevant or quality pictures to enhance the presentation. | There is little or no evidence of quality pictures. |
| Bibliography | There are four or more Internet sites or other documentation cited in the PowerPoint. Utilized APA style with no errors. | There are three Internet sites or other documentation cited in the PowerPoint. Utilized APA style, had some minor errors. | There are two Internet sites or other documentation cited in the PowerPoint. Did not follow APA style or had major errors. | There is only one Internet site or other documentation cited in the PowerPoint. Did not follow APA style. |
Open a new document and use the categories to score each group. Put the names and summary of each presentation


